DTeam 技术日志
Doer、Delivery、Dream
Angular:Jasmine + Karma 测试实战
Angular 提供了Jasmine + Karma 的单元测试,还不了解的同学请看Angular单元测试浅说。 Angular中需要为每个被测试的文件创建以 .spec.ts 结尾的文件作为测试文件,除了引入测试文件本身需要的依赖外,还需要将被测试文件所属的依赖添加到测试文件。 在这里发现了 vscode 插件: shark-extension(yangbo),可以一键生成测试文件。
使用shark-extension插件生成测试文件
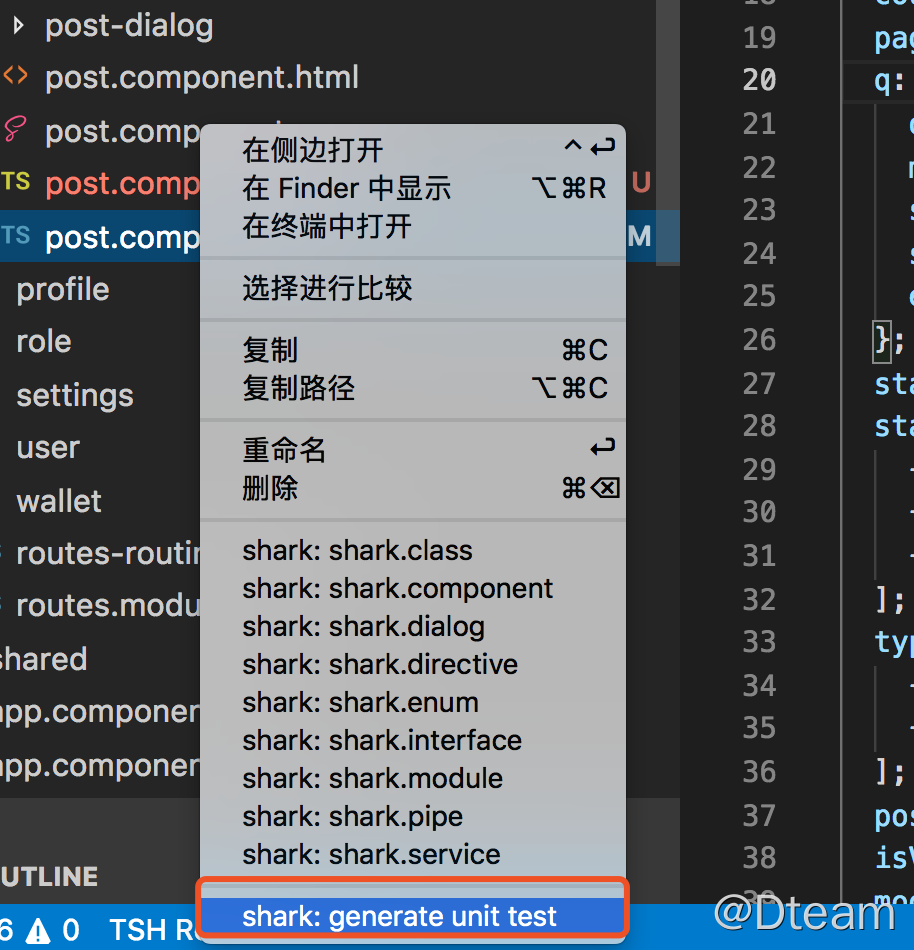
右键点击被测试的文件(以Component为例),选择 generate unit test,就会自动生成 .spec.ts文件

生成的测试文件会为每个function生成一个用例:

并且会自动添加所需要的依赖,上部分是测试需要的依赖,下部分为Component的依赖:
import { NO_ERRORS_SCHEMA } from '@angular/core';
import { async, ComponentFixture, TestBed } from '@angular/core/testing';
import { RouterTestingModule } from '@angular/router/testing';
import { HttpClientTestingModule } from '@angular/common/http/testing';

import { PostComponent } from './post.component';
import { Component,Directive } from '@angular/core';
import { Router,NzMessageService,PostService,UserService,RegularService,EmitService } from 'date-fns/difference_in_days';
大家会看到最后一条依赖引入错误,查看了Component,发现是因为引入了
import * as differenceInDays from 'date-fns/difference_in_days';
这个时候就需要手动修改:
import { NO_ERRORS_SCHEMA } from '@angular/core';
import { async, ComponentFixture, TestBed } from '@angular/core/testing';
import { RouterTestingModule } from '@angular/router/testing';
import { HttpClientTestingModule } from '@angular/common/http/testing';

import { PostComponent } from './post.component';
import { Component,Directive } from '@angular/core';
import { Router } from '@angular/router';
import { NzMessageService, NzNotificationService } from 'ng-zorro-antd';
import { PostService } from '../../common/services/post.service';
import { UserService } from '../../common/services/user.service';
import { RegularService } from '../../common/services/regular.service';
import { EmitService } from '../../common/services/emit.service';
import * as differenceInDays from 'date-fns/difference_in_days';
依赖解决后,执行测试,看看是否能将测试跑起来(这个时候是空测试,仅仅是为了检查环境是否正确,依赖是否全部引入)
ng-test
发现报错了:

 可以看到都是StaticInjectorError,发现是公用的模块没有引用(也有可能是Pipe错误),将SharedModule和DelonModule引入:
...
import { SharedModule } from '@shared/shared.module';
import { DelonModule } from '../../delon.module';

...
imports: [
    ...
    SharedModule,
    DelonModule
],
执行ng-test ,测试通过了。

Jasmine常用 Matchers 和 Setup and Teardown
Matchers是断言匹配操作,在实际值与期望值之间进行比较,并将结果通知Jasmine,最终Jasmine会判断此 Spec 成功还是失败。 Setup 与 Teardown相当于测试之前的准备工作,我们可以将重复的 Setup 与 Teardown 代码,放在与之相对应的 beforeEach 与 afterEach 全局函数里面。 了解常用的Matchers和Setup and Teardown有助于更快捷的编写测试代码。
Matchers
测试时会根据expect的实际传入的值和期望值进行比较,返回true,表示成功;如果为false,则表示失败。下列是经常用到的matchers: 查看更多信息点击这里。
expect(array).toContain(member);
expect(fn).toThrow(string);
expect(fn).toThrowError(string);
expect(instance).toBe(instance);
expect(mixed).toBeDefined();
expect(mixed).toBeFalsy();
expect(mixed).toBeNull();
expect(mixed).toBeTruthy();
expect(mixed).toBeUndefined();
expect(mixed).toEqual(mixed);
expect(mixed).toMatch(pattern);
expect(number).toBeCloseTo(number, decimalPlaces);
expect(number).toBeGreaterThan(number);
expect(number).toBeLessThan(number);
expect(number).toBeNaN();
expect(spy).toHaveBeenCalled();
expect(spy).toHaveBeenCalledTimes(number);
expect(spy).toHaveBeenCalledWith(...arguments);
Setup and Teardown
测试有一些功能时需要一些额外的设置,测试完成后又需要删除,就需要用到下列function
- beforeAll 在执行所有测试之前调用一次(describe function之前)
- afterAll 在执行所有测试之后调用
- beforeEach 在执行每个测试之前调用(it function之前)
- afterEach 在执行每个测试之后调用
测试Component
- 数据绑定
- 组件的inputs和outputs
准备工作
在写测试逻辑之前,需要做一些准备工作。
1.声明页面元素:DebugElement DebugElement是Angular的抽象层,可以安全的横跨其支持的所有平台。Angular 不再创建 HTML 元素树,而是创建 DebugElement树,其中包裹着相应运行平台上的原生元素。 下列元素后面会在beforeEach中获取为页面的input或者button等。
import { NO_ERRORS_SCHEMA, DebugElement } from '@angular/core';
...
let submitEl: DebugElement;
let loginEl: DebugElement;
let passwordEl: DebugElement;
let h1: HTMLElement
2.查找元素:By.css()
import  { By }  from  '@angular/platform-browser';
...
// beforeEach中
submitEl = fixture.debugElement.query(By.css('button'));

// 解包
submitEl.nativeElement
注意:
By.css() 静态方法使用标准 CSS 选择器选择了一些 DebugElement 节点。
这次查询返回了
<button>元素的一个 DebugElement。必须解包此结果,以获取这个
<button>元素。
beforeEach整体如下:
beforeEach(() => {
    fixture = TestBed.createComponent(UserLoginComponent);
    component = fixture.debugElement.componentInstance;
    submitEl = fixture.debugElement.query(By.css('button'));
    loginEl = fixture.debugElement.query(By.css('input[type=username]'));
    passwordEl = fixture.debugElement.query(By.css('input[type=password]'));
    h1 = fixture.nativeElement.querySelector('h1');
  });
测试数据绑定
测试页面 title 是否会绑定到页面:
因为绑定是在 Angular 执行变更检测时才发生的,所以需要通过调用 fixture.detectChanges() 来要求 TestBed 执行数据绑定。
it('数据绑定', () => {
    fixture.detectChanges();
    expect(h1.textContent).toContain(component.title);
  });
组件的inputs和outputs
it('将按钮enabled设置为false', () => {
    component.enabled = false;
    fixture.detectChanges();
    expect(submitEl.nativeElement.disabled).toBeTruthy();
});

it('输入用户名密码,点击登录', () => {
    let username = '';
    let pwd = '';

    loginEl.nativeElement.value = "17711111111";
    passwordEl.nativeElement.value = "123456";

    component.loggedIn.subscribe(value => {
        username = value.username;
        pwd = value.pwd;
        expect(username).toBe("17711111111");
        expect(pwd).toBe("123456");
     });
    submitEl.triggerEventHandler('click', null);
});
如果想让组件自动检测更新,使用 ComponentFixtureAutoDetect ,配置 TestBed:
import  { ComponentFixtureAutoDetect }  from  '@angular/core/testing';
...
providers:  [
...
{ provide:  ComponentFixtureAutoDetect,  useValue:  true  }  ]
测试Service
下面是模拟后端返回数据的示例
准备工作
1.导入HttpClientTestingModule和HttpTestingController
import { HttpClientTestingModule, HttpTestingController } from '@angular/common/http/testing';
...
let httpTestingController: HttpTestingController;
...

imports: [
...
HttpClientTestingModule]
2.获取httpTestingController
beforeEach(() => {
    ...
    httpTestingController = TestBed.get(HttpTestingController);
});
3.在afterEach中调用verify,确保没有未完成的请求
afterEach(() => {
    httpTestingController.verify();
 });
测试http返回List
首先mock一个数组当作后端返回的数据,可以判断数组长度,数据字段等。 如果HttpEventType的类型为Response,则表明响应事件的返回等于模拟HTTP请求的数据。 主要代码:
import { NO_ERRORS_SCHEMA } from '@angular/core';
import { TestBed } from '@angular/core/testing';
import { HttpEvent, HttpEventType } from '@angular/common/http';
import { HttpClientTestingModule, HttpTestingController } from '@angular/common/http/testing';
import { UserService } from './user.service';
import { _HttpClient } from '@delon/theme';
import { URL } from '../url';
describe('UserService', () => {
  let usersService: UserService;
  let httpTestingController: HttpTestingController;
  beforeEach(() => TestBed.configureTestingModule({
    imports: [HttpClientTestingModule],
    providers: [
      UserService,
      _HttpClient
    ],
    schemas: [NO_ERRORS_SCHEMA]
  }));

  afterEach(() => {
    httpTestingController.verify();
  });

  beforeEach(() => {
    usersService = TestBed.get(UserService);
    httpTestingController = TestBed.get(HttpTestingController);
  });

it('should run #getUserList()', () => {
      const mockUsers = [
        { id: 1, username: 'user1'},
        { id: 1, username: 'user2'},
      ];

      usersService.getUserList({}).subscribe((event: HttpEvent<any>) => {
        switch (event.type) {
          case HttpEventType.Response:
            expect(event.body).toEqual(mockUsers);
        }
      });

      const mockReq = httpTestingController.expectOne(URL.USER);
      expect(mockReq.cancelled).toBeFalsy();
      expect(mockReq.request.responseType).toEqual('json');
      mockReq.flush(mockUsers);
  });

  afterEach(() => {
    TestBed.resetTestingModule();
  });
});
测试Directive和Pipe
测试指令: 需要获取元素,调用 triggerEventHandler 改变元素属性:
triggerEventHandler 为 Angular DebugElement实例提供的一种方触发事件。
it('鼠标移动改变颜色', () => {
    inputEl.triggerEventHandler('mouseover', null);
    fixture.detectChanges();
    expect(inputEl.nativeElement.style.backgroundColor).toBe('blue');

    inputEl.triggerEventHandler('mouseout', null);
    fixture.detectChanges();
    expect(inputEl.nativeElement.style.backgroundColor).toBe('inherit');
  });
测试管道: 需要获取元素,调用 transform 判断返回值:
it('数值除以100', () => {
    const result = pipeInstance.transform(300);
    expect(result).toBe(3);
 });
代码覆盖率报告
在 angular.json 中添加可生成测试覆盖率报告:
"test":{
  "options":{
  "codeCoverage": true
  }
}
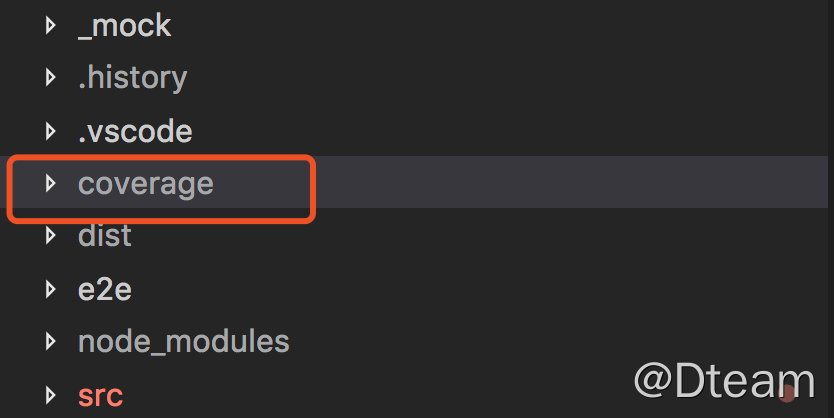
然后执行,会在根目录下生成 coverage 文件夹:
ng test --code-coverage
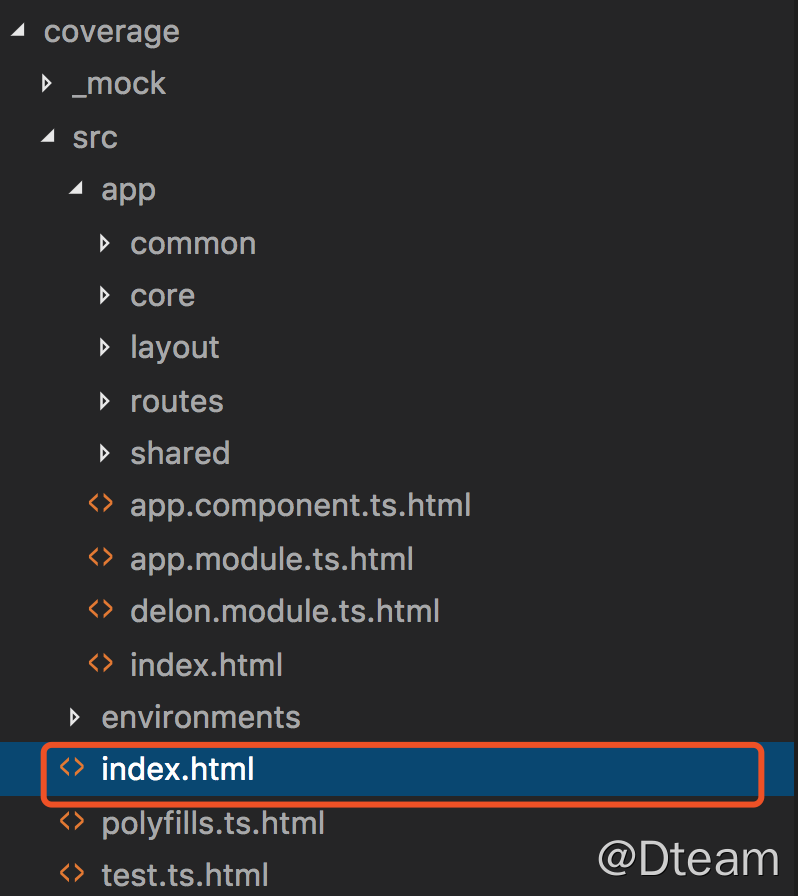
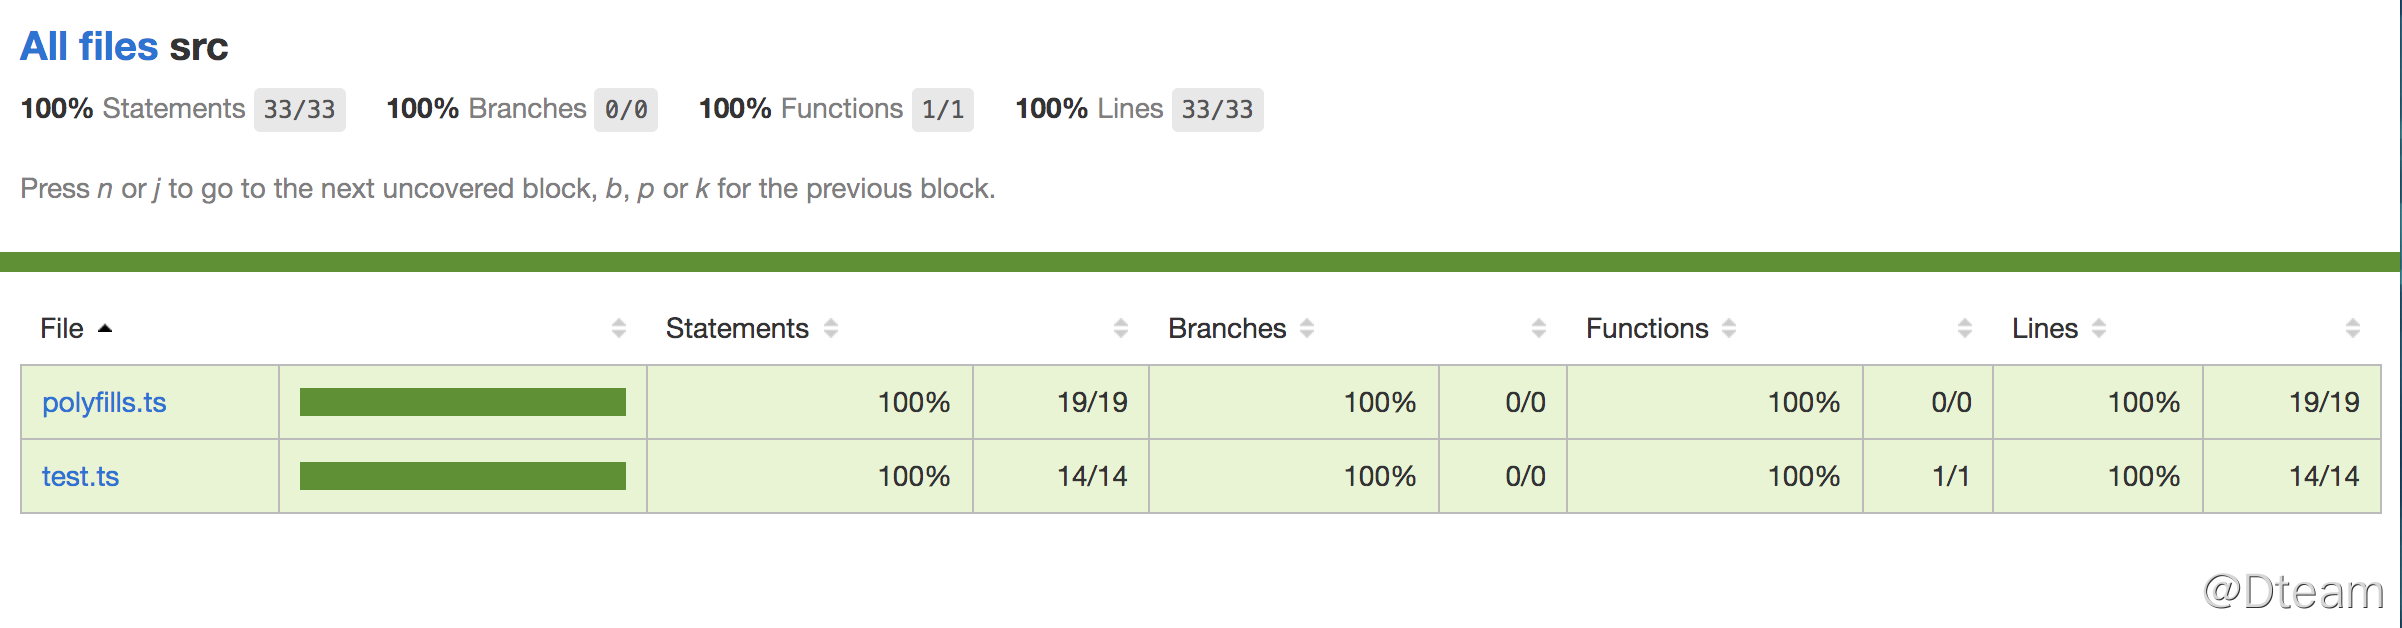
 复制 index.html 目录在浏览器中打开,就可以看到测试报告了:
以上就是在Angular测试中经常需要用到的干货,在实际应用中可能需要组合起来测试,想知道更详细的内容,可查看Angular官网测试部分。
觉得有帮助的话,不妨考虑购买付费文章来支持我们 🙂 :
付费文章