DTeam 技术日志
Doer、Delivery、Dream
Tailwind 入门
作为前端开发,最痛苦的就是项目后期调整 CSS 代码,复杂凌乱的 CSS “牵一发动全身”。Tailwind 为 CSS 的使用提供了便利,让开发者可直接在 HTML 源码上构建完全定制化的设计。
PostCSS
PostCSS 是对 CSS 进行处理的工具,通过各种不同的插件编译出你所需要的的 CSS。 常用的插件有:
- 自动补全浏览器前缀:autoprefixer
- 使用下个版本 css 的草案语法:postcss-cssnext
- 自动把 px 代为转换成 rem: postcss-pxtorem
- 将 px 转为 viewport 的单位:postcss-px-to-viewport
Tailwind
Tailwind 的理念是工具优先(Utilities First),它不提供 UI 组件,而是提供了基础的工具类(utility classes),让开发者可直接在 HTML 源码上构建完全定制化的设计。
Tailwind 可以作为 PostCSS 插件来使用。
为什么选择 Tailwind
先来看一张图:
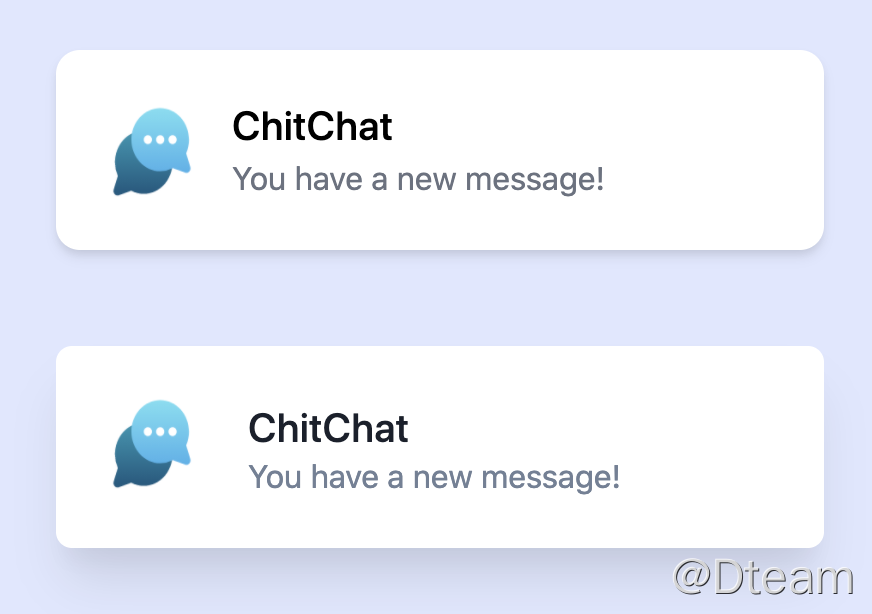
再看下面两段代码:
<!-- HTML + CSS -->
<div class="chat-notification">
  <div class="chat-notification-logo-wrapper">
    <img
      class="chat-notification-logo"
      src="/assets/images/logo.png"
      alt="ChitChat Logo"
    />
  </div>
  <div class="chat-notification-content">
    <h4 class="chat-notification-title">ChitChat</h4>
    <p class="chat-notification-message">You have a new message!</p>
  </div>
</div>

<style>
  .chat-notification {
    display: flex;
    max-width: 24rem;
    margin: 0 auto;
    padding: 1.5rem;
    border-radius: 0.5rem;
    background-color: #fff;
    box-shadow: 0 20px 25px -5px rgba(0, 0, 0, 0.1), 0 10px 10px -5px rgba(0, 0, 0, 0.04);
  }
  .chat-notification-logo-wrapper {
    flex-shrink: 0;
  }
  .chat-notification-logo {
    height: 3rem;
    width: 3rem;
  }
  .chat-notification-content {
    margin-left: 1.5rem;
    padding-top: 0.25rem;
  }
  .chat-notification-title {
    color: #1a202c;
    font-size: 1.25rem;
    line-height: 1.25;
    font-weight: 500;
  }
  .chat-notification-message {
    color: #718096;
    font-size: 1rem;
    line-height: 1.5;
  }
</style>
<!-- HTML + Tailwind-->
<div
  class="p-6 max-w-sm mx-auto bg-white rounded-xl shadow-md flex items-center space-x-4"
>
  <div class="flex-shrink-0">
    <img class="h-12 w-12" src="/assets/images/logo.png" alt="ChitChat Logo" />
  </div>
  <div>
    <div class="text-xl font-medium text-black">ChitChat</div>
    <p class="text-gray-500">You have a new message!</p>
  </div>
</div>
很明显,使用 Tailwind 的代码量少了很多,代码也清晰了。
Tailwind 的部分优点:
- 自定义
- 支持响应式
- 压缩后 CSS 文件非常小
- 不需要关注命名
Angular9 下使用 Tailwind
安装
下面讲解在 Angular9 下,如何安装、配置 Tailwind。如下是安装命令:
npm install -D tailwindcss@latest postcss@latest autoprefixer@latest
配置
执行如下命令,会生成 tailwind.config.js 文件:
npx tailwindcss init
npx tailwindcss init -p //同时生成 postcss.config.js 文件
tailwind.config.js 内容如下:
module.exports = {
  purge: [],
  darkMode: false, // or 'media' or 'class'
  theme: {
    extend: {},
  },
  variants: {
    extend: {},
  },
  plugins: [],
};
postcss.config.js 内容如下:
module.exports = {
  plugins: {
    tailwindcss: {},
    autoprefixer: {},
  },
};
如果想了解 Tailwind 的配置,还可以通过如下命令生成 Tailwind 的所有缺省配置:
npx tailwindcss init --full
不使用 PostCSS
如果不熟悉 PostCSS,可以直接用如下命令生成 Tailwind.css 文件:
npx tailwindcss-cli@latest build -o /assets/styles/tailwind.css
这样会根据 Tailwind 的配置文件,在项目的 assets/styles 目录下生成一个名为 tailwind.css 文件,查看这个文件你会发现 Tailwind 中定义的类都在这个文件中。在 index.html 中引入这个文件:
<link href="/tailwind.css" rel="stylesheet" />
这样就可以使用 Tailwind 了。
如果希望在自定义的 css 文件中使用 Tailwind 的内容,比如:
//app.css
@tailwind base;
@tailwind components;

.btn {
  @apply px-4 py-2 bg-blue-600 text-white rounded;
}

@tailwind utilities;
同样可以通过这个命令生成对应的 css 文件:
npx tailwindcss-cli@latest build ./src/assets/styles/app.css -o ./dist/assets/styles/app.css
使用 PostCSS
通过提前编译,可以正常使用 Tailwind CSS,但是对于开发着而言有些麻烦,开发过程中对 css 的更改不能做到“即改即得”的效果。这就需要 PostCSS 来出力了,在开发模式下随时编译更新 CSS。
执行如下命令安装相关包:
npm install postcss-loader@^4.2.0 postcss-scss ngx-build-plus
这里需要注意,ngx-build-plus 会将 angular.json 文件中的 @angular-devkit/build-angular 替换为 ngx-build-plus。
在 postcss.config.js 引入插件,内容如下:
module.exports = {
  plugins: [
    require("postcss-import"),
    require("tailwindcss"),
    require("autoprefixer"),
  ],
};
新增文件 webpack.config.js , 内容如下:
module.exports = {
  module: {
    rules: [
      {
        test: /\.scss$/,
        loader: "postcss-loader",
        options: {
          postcssOptions: {
            ident: "postcss",
            syntax: "postcss-scss",
            path: "./postcss.config.js",
          },
        },
      },
    ],
  },
};
修改 package.json 文件:
...
"scripts": {
    "ng": "ng",
    "start": "ng serve --extra-webpack-config webpack.config.js",
    "build": "ng build --extra-webpack-config webpack.config.js",
    ...
},
...
在 style.scss 文件中添加如下内容:
@import "tailwindcss/base";
@import "tailwindcss/components";
@import "tailwindcss/utilities";
这样就可以正常使用 Tailwind 了。
配置项
- theme:可定义颜色、字体、边框等跟视觉设计有关的内容;
- variants:为工具插件定义的变量;
- plugins:注册插件;
- important:设置 Tailwind 的工具类是否添加上!important;
- separator:分隔符;
- purge:去掉无用的文件和 CSS 内容(文章后面会介绍用法);
colors
theme: {
    colors: {
      maskblue:{50: '#037dd6', 100: '#037d06'}
    }
}
上述配置会直接对 textColor, backgroundColor, borderColor 生效,比如 bg-maskblue-50,这样直接使用即可。
断点(Breakpoints)
所谓断点就是屏幕 min-width 的限定,比如
theme: {
  screens: {
    tablet: "640px";
  }
}
/* 如下是编译后的内容*/
.max-w-screen-tablet {
  max-width: 640px;
}

@media (min-width: 640px) {
  .tablet\:container {
    width: 100%;
  }
  ...;
}
上述设置方法会将缺省的断点覆盖掉,仅保留一个名为 tablet 的断点,如果需要使用 Tailwind 缺省的断点,可以通过 extend 来扩展:
theme: {
    extend: {
      screens: {
        '3xl': '1600px',
      },
    },
  },
注意,extend 会将设置的断点添加到断点列表的末尾,如果你添加的是一个尺寸小的断点,那就不能用 extend 的方式了,因为这会导致断点按照从小到大重新排序,可以选用如下方式将缺省断点引入:
const defaultTheme = require('tailwindcss/defaultTheme')

theme: {
  screens: {
    'tablet': '360px',
    ...defaultTheme.screens
  }
}
在进行响应式开发的时候,断点非常好用,它会减少非常多的 CSS 代码:
  screens: {
    phone: { max: "770px" },
    md: { min: "770px" },
  },
<div class="px-16 md:flex phone:px-5 ">...</div>
伪类(Variants)
常见的 hover、focus、dark 就是 Variants,也可以理解为变量。
  //扩展伪类
  variants: {
    extend: {}
  },

  //直接取代缺省的伪类
  variants: {
    backgroundColor: ['active'],   //只会生成 active 伪类
  },

  variantOrder: [],  //定义伪类的统一顺序

  //或者单独指定顺序
  variants: {
    backgroundColor: ['hover', 'focus'],  //hover 先于focus
    borderColor: ['focus', 'hover'],      // focus 先于 hover
  },
关于更多配置这里就不详细赘述,可参见 配置文档。
实践
可以在 CSS 中自行组合,但是推荐在 HTML 中直接使用
.my-css{
  @apply hover:bg-indigo-700;
}

/* 编译后的CSS代码 */
.my-css:hover {
  --tw-bg-opacity: 1;
  background-color: rgba(67, 56, 202, var(--tw-bg-opacity));
}
<div class="hover:bg-indigo-700">我是hover</div>

<div class="my-css">我是hover</div>
在这里需要注意,如果在 CSS 组合会导致编译后的 CSS 文件很大,看如下代码:
.my-css{
  @apply hover:bg-indigo-700 py-2 px-4 bg-maskblue-50;
}
/* 编译成如下内容*/
.my-css {
  --tw-bg-opacity: 1;
  background-color: rgba(3, 125, 214, var(--tw-bg-opacity));
}

.my-css:hover {
  --tw-bg-opacity: 1;
  background-color: rgba(67, 56, 202, var(--tw-bg-opacity));
}

.my-css {
  padding-top: 0.5rem;
  padding-bottom: 0.5rem;
  padding-left: 1rem;
  padding-right: 1rem;
}
所以通常不建议在 CSS 中使用 apply,而是直接在 HTML 中使用。
尽量使用组合类
<div class="ml-7 mr-7">我是mx</div>

<!-- 可以合成下面的用法 -->

<div class="mx-7">我是mx</div>
Tailwind 提供了丰富的工具类,选择合适的使用,“宁少勿多”。
定义自己的工具类
如果 Tailwind 提供的工具类不够用,还可以定义自己的工具类:
@layer utilities {
  .my-fontsize {
    font-size:36px;
  }
}
不要组件嵌套组件
避免使用如下类型的代码:
.btn {
  ...;
}

.btn-blue {
  @apply btn;
}

/*建议分拆成如下*/
.btn-blue {
  ...;
}

.btn {
  ...;
}
压缩 CSS
如果不进行任何改动,运行程序或者打包时,你会发现生成的 style.css 文件非常大,以 M 为单位,看里面的代码会发现 Tailwind 的 base.css、component.css、utilities.css 文件的内容都打包进了 style.css 文件中了。能否将没有用的内容踢出呢?有,通过 purge。
方法一:缺省 Tailwind 只在 NODE_ENV=production 下会使用 Purge 去掉无用的 CSS,所以修改 package.json 内容:
scripts: {
  "start": "NODE_ENV=production ng serve",
  "build": "NODE_ENV=production ng build --prod --aot"
}
方法二:修改 tailwind.config.js 中 purge 内容。
purge: {
  enabled: true,
  content: ["./src/**/*.html", "./src/**/*.ts"]
}
挑战
使用 Tailwind 的首要挑战是需要记住 Tailwind 的工具类的名字,刚开始使用时,会觉得不适应,好在 Tailwind 的文档中详细介绍了各个工具类。
第二个挑战就是 HTML 代码的可读性,如果直接在 HTML 使用工具类,会导致代码的可读性差。
第三个挑战是在开发初期进行组件设计,这就避免了开发过程中不停的定义 CSS 的类,从而导致开发后期不敢轻易的改动 CSS,以及越来越多的垃圾代码。
小结
Tailwind 为开发者提供了丰富的工具类,方便开发者使用。如果没有合适的组件设计或者使用方法不当,反而发挥不了 Tailwind 的优势,且增加了开发者的学习成本。这也就逼迫前端在动工前,做好组件的设计、CSS 的设计,以期提升前端开发的效率和工作质量。工具很好,且用且珍惜。
参考文档
觉得有帮助的话,不妨考虑购买付费文章来支持我们 🙂 :
付费文章